To get started with Analytics Edge and the Constant Contact connector, you need to install and register an Analytics Edge add-in. Then the Constant Contact connector needs to be installed — it will automatically activate a 30 day trial for you.
Constant Contact Account Wizard
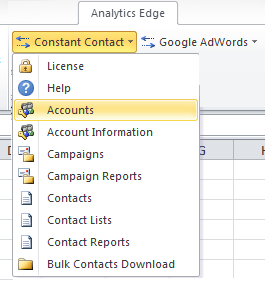 Open the Constant Contact – Accounts wizard from the Analytics Edge ribbon bar. All of the connector wizards are available from a drop-down menu that appears when you click the connector’s button.
The button may appear as a large square, or it may appear as a wide button as shown in the image.
Constant Contact Login
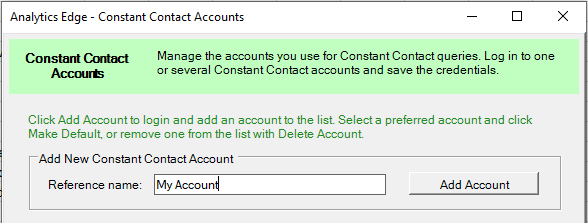
On the Accounts wizard, enter a name for the account and click the Add Account button. Note that the account “Reference” name does not have to match your login account — it is used to identify the account in Analytics Edge, so it should be meaningful to you.
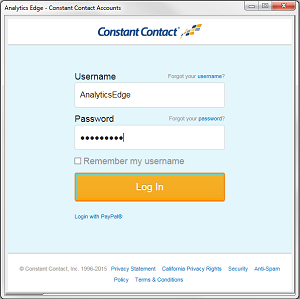 A dialog will open where you to log in with your Constant Contact account and password.
A second dialog will confirm that you are allowing Analytics Edge to access your Constant Contact account.
The new account will be added to the list of Constant Contact Accounts and it will be tagged (*) as the default account to use.
Close the Accounts wizard.
Get A List of Recent Campaigns
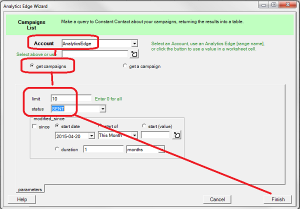
Open the Constant Contact – Campaigns wizard. By default, the wizard is configured to get all campaigns for the account.
You might want to limit the results to SENT campaigns, and only the most recent 10.
Click Finish to run the query.
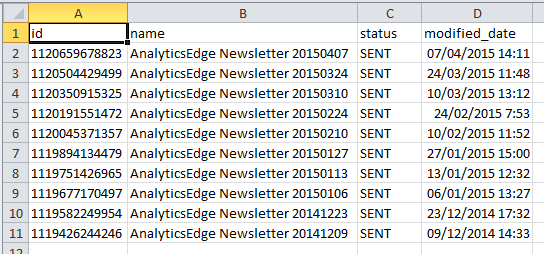
From the results, we can see that each campaign has a unique id number. To get details on a campaign, we need to use that id number to identify the campaign of interest.
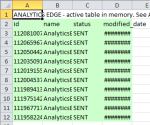 Analytics Edge Add-in Users: you will be looking at a temporary worksheet with green shading on the cells. This is what Analytics Edge is working with in memory. Only a sample of a large query will be shown. [optional] If you want the results in a worksheet, click the Analytics Edge ribbon File > Write to Current Cell menu option.
Get Details For A Campaign
Now that you have the campaign id’s, you can get information about any of the campaigns: summary statistics, opens, clicks, bounces, etc. We can start with simply getting more information about the campaign itself, such as the subject line and summary statistics. To do this, we open the Constant Contact – Campaigns wizard again, and select Get a campaign.
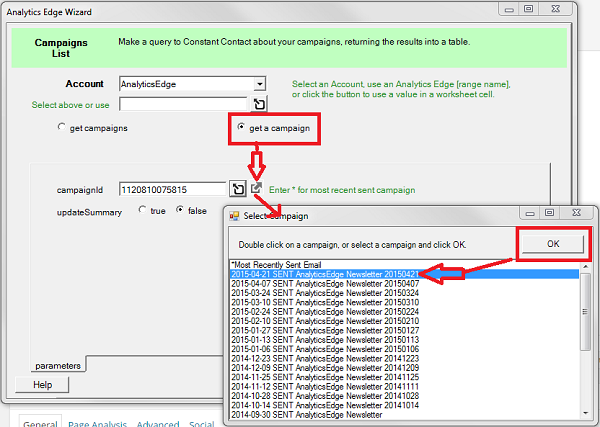
Either enter a campaign id from the list you had previously, or click the lookup ![]() button to pop up a list that you can select a specific campaign. Click Finish to run the query. From the results we get a lot of information about the campaign.
button to pop up a list that you can select a specific campaign. Click Finish to run the query. From the results we get a lot of information about the campaign.
Information Available
The campaign details includes information about the campaign email itself, like subject, who it is from, the greeting used, and various other settings. It also includes tracking summary counts of sends, opens, clicks, etc. Finally, all the links being tracked in the campaign are included along with the link id (url_uid) number and count of clicks.
Option: Use a Cell Reference
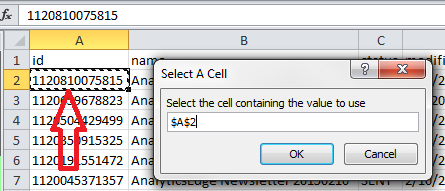
 The wizard also allows you to get the campaign id from a worksheet cell, such as the most recent campaign sent from the previous query. To do this, click the cell reference
 ![]() button and select the worksheet cell where the id number is stored. if you select a range of cells, only the first will be used.
button and select the worksheet cell where the id number is stored. if you select a range of cells, only the first will be used.

Analytics Edge Add-in Users: Use a Range Name Option
With the Add-in, you can use the results of one query to drive the next by using a [Range Name] reference. If you want to use the campaign id’s from the “id” column of the previous query, enter “[id]” (without the quotes). Analytics Edge will get details for all of the campaigns listed in the “id” column; if you picked 10 campaigns in the previous query, it would make 10 queries and deliver 10 rows.
 Analytics Edge Add-in Users: Optional Next Steps
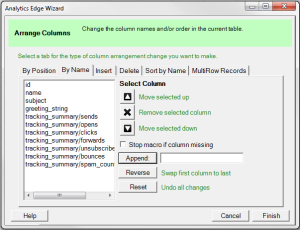
You can select a subset of columns that you want to keep using the Table – Arrange wizard. Use the By Name option to select the columns. You can also do other things like calculate Open Rate with the Column – Calculate wizard.
Downloading Opens Details
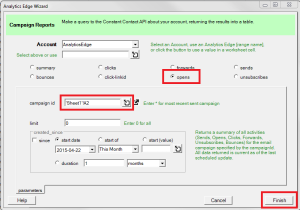
You can download a detailed list of who opened a specific campaign using the Constant Contact – Campaign Reports wizard.
Select opens and pick a campaign id, then click Finish. Using a limit of 0 will retrieve all of the opens for the campaign.
The results may include what appear to be duplicates, but they are actually individual contacts that have opened your email multiple times.
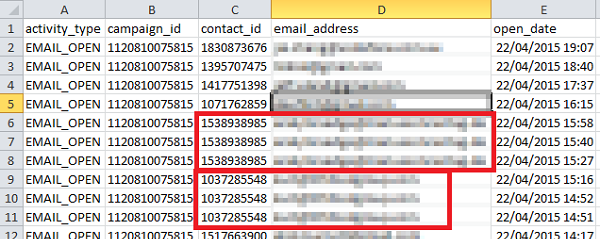
Analytics Edge Add-in Users: you can use the Table – Duplicates wizard to get rid of the duplication, keeping the earliest open date/time.
You can download the bounces, clicks, forwards, sends and unsubscribes in a similar fashion.
Download Contact List
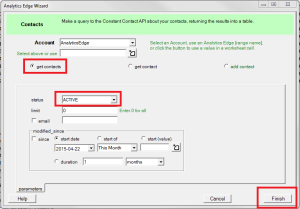 To download all the contacts from Constant Contact, use the Contacts wizard, get contacts option. You should select the ACTIVE status so you don’t bother downloading the removed, unconfirmed or opt-out entries.
Note: large lists may take a long time to download.
Information Available
The contact list includes all the available information about the contacts as well as the lists that they belong to. Contacts are uniquely identified by an id number, and the lists are identified by the list id number.
Downloading Contact Activities
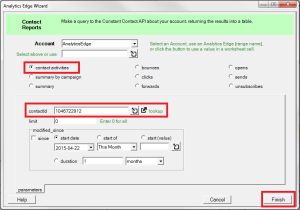 Using the Contact Reports wizard you can look into the behaviour of specific contacts (identified by a contact id number). Caution: if you click the lookup
 ![]() button, you will have to wait while the entire contact list is downloaded.
button, you will have to wait while the entire contact list is downloaded.
You can also get a summary by campaign, or individual types of activities like opens, sends or clicks.
Campaigns are identified by campaign id number. You will need to cross reference with the results of a campaigns query (above) to get information about which campaign is which.
Analytics Edge Add-in Users: you can use the Multiple – Combine wizard to get the campaign name or subject line added to your results. The campaign_id column will need to be renamed ‘id’ using the Arrange wizard before the tables can be combined; they need to share a ‘key’ column.
Next Steps
You have all the basics to using the Constant Contact connector to download your campaign and contact data. You can also get information about the various Contact Lists you have in your account. That wizard works similarly to the Contacts wizard.
Although you can use the Analytics Edge Add-in to just download your data, you will find the calculations and lookups required to generate a finished report are much easier to perform with the Add-in functions.
