 Following a Quick Query, the Quick Functions wizard allows you to Pivot, Arrange, Sort or Filter your data as well as provides options to Write the results.
Pivot Function
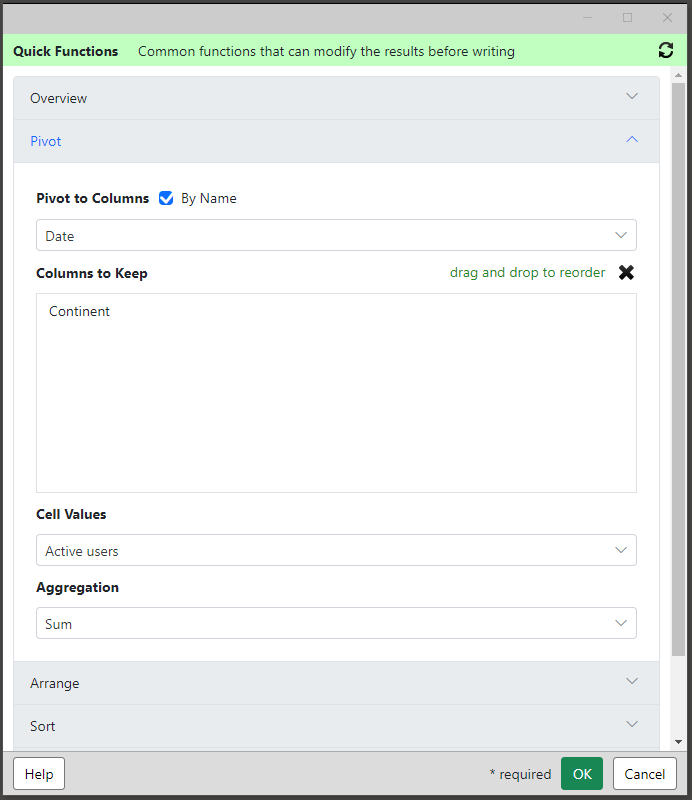 Pivot to Columns – select a column (optionally By Name) to pivot or choose No Pivot.
Columns to Keep – keep only the columns you want.
Cell Values – select a column to be used for the values in the cells of the pivoted table.
Aggregation – select the aggregation to use when there are duplicate values for a specific cell position.
Arrange Function
 No Change – do not change the order of the columns.
By Name/Position – Use this option to rearrange the columns based on the positions (column letters), or By Name.
Sort By Name – Use this option to arrange the columns by the names of the columns themselves,. Select the columns you want sorted, then the sorting options.
Sort Function
 Create one or more sorting rules which will be applied in sequence. If two rows are equal in value for the first rule, the next rule is used to determine the order.
Add Sort
Column – you can select columns By Name or by position (column letter).
Ascending/Descending – adds the selected column to the Sorting Rules.
Sorting Rules – you can change the order of the sorting rules, or remove any of the rules. Sorting uses the rules from the top down; the second rule is used only after the first rule is run.
Filter Function
 Create one or more filter rules which will be applied in sequence.
Add Filter
Column – you can select columns By Name or by position (column letter).
Criteria – pick the filter criteria.
Value – enter the value for the filter.
Add – add a new filter rule with the column, criteria and value.
Filter Rules – you can change the order of the filter rules, or remove any of the rules.
Write Function
Choose how you want to write the data from the query.
 Write to Worksheet
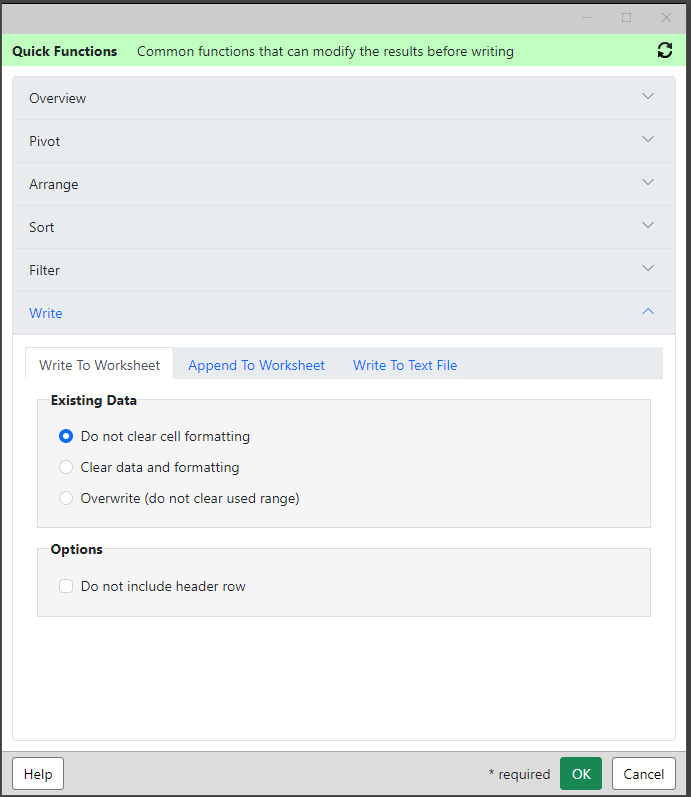
Write the results to the worksheet location that was active when the Quick Query was initiated.
Existing Data
The existing data may contain more or fewer rows and columns than the new data, so the add-in clears the block of contiguous data it finds at the target cell.
Do not clear cell formatting – this option will only change the cell values and not affect any cell formatting in place. Note that this can cause problems if the format of the cell does not match the data (e.g. number versus text versus date).
Clear data and formatting – clears the existing data and formatting from the worksheet.
Overwrite (do not clear used range) – do not clear any of the worksheet. The results overwrite the existing cell values (formatting is not affected). Note that if there is no new data to write, the existing data will not be cleared.
Options
Do not include header – check this to prevent the column names from being included in the first row of the results written.
 Append to Worksheet

Append the results to the current worksheet instead of overwriting the data. Columns are matched by name.
Matching Rows
Keep both (may create duplicates) – When appending to the existing data in the worksheet, simply append all the new data to the existing data. This may results in duplicate rows.
Do not change existing rows – If the new data contains rows with matching text and date columns, only append rows with new combinations. This does not change the previous reported values.
Update to new values – If the new data contains rows with matching text and date columns, replace the existing numeric values with the new values. This will refresh the previously captured values.
Write to Text File
 Write the result to a text file instead of to the worksheet.
Folder Path – the path to folder use.
File Name – name of the file to write to.
Delimiter – pick comma or tab separated format,
Date Format – if a date column is written, choose how the date should appear by entering the appropriate codes.